Wednesday, November 14, 2012

"Growing Onion Tops in Winter"

I ran across this idea on Pinterest about the time we were putting our garden to bed for the winter and I wasn't sure what to do with all the scallions I still had growing.  Pull them up and replant in flower pots and  boxes and watch them grow throughout the winter!  You can't pull them from the flower pots, too bad because I like the white parts too, but you can cut them almost to the white parts and use the tops!  They keep regrowing over and over and over!  Just don't cut down into the white but just to where the green grows out of the white and you'll have new shoots in a couple of days and by the end of a week you'll have a whole new crop to cut.


I planted these one at a time......then I planted the next pot the same way.


I found as many pots I had available and proceeded to plant onions!
They need lots of sun so I was off on a search as to where I could put them and where they would be handy for harvesting.


With this big pot I decided "what the heck" just planted a big clump of them I pulled from the garden!
This second cutting I also decided to plant some seeds around the perimeter of this pot so I'll see if I get new onions in a few weeks.


This is the second harvest just off the large clump of onions in the big pot above.  Dampen a paper towel slightly, roll the towel around the onion tops and place in a plastic bag and store in the refrigerator.  They keep for many days but I bet you'll be finding ways to use them before they go bad!


Eggs sunny side up with chopped green onions and a sprinkling of cheese this morning....yum!
I also like red pepper chili/garlic sauce on mine for breakfast, Greek Yogurt and fresh baked No-Knead bread (recipe below) - super yum! 

Enjoy your green onion tops!

Saturday, November 3, 2012

Let's talk Vacuum Sealers


 I own a Weston 2300 Pro Vacuum Sealer.  I have owned a couple of models of the Food Saver sealers over the years but they have died quickly.  When I went on a search for a new sealer I found this one - granted about 3X's the price but if it lasts more than 3X's the others then I'll be ahead of the game.  I have also found that the Weston works ALL THE TIME whereas the Food Saver had the habit of failing frequently in the sealing process.

After much searching and price comparisons I bought the Weston from these people on line:

https://www.thehuntersbutchershop.com

Good service, best price, no shipping and a nice large roll of bags to start with.  On a reorder basis, the bags I have found are of a better quality and less money than the Food Saver's or big box store's prices also.


Buttons up close

This is an extremely easy machine to use.  It is a large unit and takes up a sizable piece of countertop real estate so check measurements as to whether something like this will work for you.  The Food Savers I've owned I've stored away in a drawer but this is way too big and heavy to be lugging in and out of drawers or a cabinet.  I use my Weston, maybe not every day, but several times per week so having it out on a counter was important to me.

Left over egg/sausage/potato frittata from breakfast

I decided rather than having to eat this the next day or the day after - and we all know the longer something sits in the refrigerator the more tired it gets - I would vacuum seal it and freeze for sometime when time was limited and we needed or wanted a quick breakfast.  This frittata was big and fluffy while it sat in the pan but as the cheese cooled it shrunk.  Not to worry, because it can be reheated in the oven for about 15 minutes at 350 degrees and it will yummy up again! 


First step in preparing any item for vacuum sealing is to wrap in plastic wrap unless it's a dry product.  I buy large rolls of commercially available plastic wrap at Sam's.  My husband made me this cute box that sits on my island to hold this big roll.  I don't always put books under the wrap, depends on an item's size. I pull out a nice length, run the cutter across and proceed to wrap at least once.

You probably are wondering why I would wrap everything first.  Well, the Weston has a vacuum hole - see hole under the top of the plastic bag in next photo?  This hole is where the suction takes place.  If you have anything that is really wet and sloppy you can always run the risk of sucking wet juices into that hole - not a good thing!  Wet meat juices into the hole could ruin your sealer!  I also pre-wrap all oily or messy things to be sealed because the edges of the bags need to stay CLEAN!  Having to struggle getting something into a bag and then trying to clean up the edge is a pain....just pre-wrap first and problem solved.  I double and sometimes triple wrap meat patties and wet meats before stuffing into the vacuum sealing bags.  One other advantage of pre-wrapping is that you can slit the seal of the outer bag, remove the meats to defrost outside of the bag....no sloppy juices inside the bag and it then can be used again.  Saves money on bags if you can use them many times before they are too small to use on much of anything else and then throw them away.  Sloppy bags are hard to get really clean, a pain to get dry and then sometimes they still won't seal properly so the extra step in pre-wrapping is worth the trouble.

I lay a couple of books on the counter to bring small bags up more level with the edge so it is easier to get a nice flat edge to the bag for the lid to sit on.  There are some great videos on the Net that talks about this sealing process.  It's really easy and a short learning curve.

One slice of frittata being sealed and ready to label.

Four slices labeled with name and date and ready to go in the freezer which took all of about 15 minutes.

I own a large and small mouth vacuum lid sealer for the Food Saver that is for sealing Mason jars.  I put up a lot of products in Mason jars to store either on shelves, refrigerator or freezer.  I had owned the large mouth sealer for several years and about 6+ months ago I bought the regular mouth sealer lid but it doesn't work very well at all.  The large mouth works about 98-100% of the time - long trial run and trying different techniques but not much helped this regular size lid sealer to work satisfactorily, so I don't use it and stick to the large mouth jars.

I put up large bulk buys for the refrigerator things like cottage cheese, ricotta cheese, blue cheese, dates,  sour cream, home made salad dressings and sauces - anything that you want to keep more than a week should be vacuum sealed.  Most of the cheeses will last several months w/o any deterioration.  I have tried vacuum sealing large quantities of some fresh products like broccoli and cabbage in bags, not jars, and this hasn't been too satisfactory.  The bags seem to leak air and allow spoilage to start taking place fairly quickly....could have been some of my old Food Saver bags.   I plan to try again once I place an order for a new assortment of Weston bags which seem to be of a better quality and the failure rate is far less.

I buy full chuck roast shoulders 15-25 pounds, which I cut up into roasts and grind up for hamburger patties and one pound packages for whatever I decide to use it for.  A shoulder will usually last my husband and I up to a year  along with other meats I keep on hand.  I've not had anything usually more than a year in the freezer except some fresh made salmon patties which are still good.  I can't speak to how much beyond a year the meat will keep but I've read and been told up to a couple of years.  I've yet to have a failure in the sealing of any of these packages of meat except one bag of a cut up pepperoni.  The meat tastes and looks as good as the day it was ground and that's good enough for me!

If I have not covered something you have a question about then feel free to contact me and I'll try to answer your questions.  The Weston Vacuum Sealer is a fantastic household tool that can save you many dollars and deliver wonderful meats and other frozen products a year after you put them up.  You won't go wrong with this sealer.

Tuesday, October 23, 2012

"Lemon Lava Cake"


This recipe is for a dear friend who lives in Ireland.....this one is for you Wilma!

This was a recent "find" on Pinterest.  I am constantly blown away by the shear numbers of recipes and great looking food.  I probably could start now making everything I've saved so far on various boards of I've created and NEVER even make a dent in the collection before I assume room temperature.....hooray for Pinterest - go take a look!

Lemon Lava Cake
 Photo of it being served on the plate.

 How it looked when it came out of the oven.

This is so incredibly easy and tasty!

Time needed
10 min preparation + 55 min cooking
Serving Size / Yield
12 servings
Ingredients
    1 box lemon cake mix & ingredients
    2 boxes instant lemon pudding
    2 C. cold milk
    1/3 C. sugar
    1 1/4 C. water
    3 Tbs. lemon juice
    Powdered sugar, for dusting

Directions

 Prepare cake mix as directed on package.
(I had a white cake mix which called for beating the egg whites - nope, wasn't going to do that so I just added two whole large eggs.)

 Pour cake mix into greased 13x9 baking dish.

 Combine dry pudding, milk, sugar, lemon juice, and water in bowl.

 Whisk together for 2 minutes until well combined and slightly thickened.

 Pour pudding mixture over top of cake mixture. Do not spread it
  
Place baking dish on top of cookie sheet to catch any drips while cooking. Bake at 350 degrees for 55 minutes to 1 hour.
        
 Allow to cool for 20 minutes while sauce thickens slightly. Sprinkle top of cake with powdered sugar.

I can visualize this cake in many different reincarnations - chocolate cake and vanilla pudding; white cake and chocolate pudding; strawberry with maybe vanilla - you get the idea - pick your favorite favors and have fun with it.

I found that the cake is really good warm but I have to confess I ate some of it right out of the refrigerator w/o heating the next night.  Richard liked it with heavy cream over it - nothing like "gilding the lily" as they say - makes my stomach roll over but then whipped cream, cool whip or something like or maybe even ice cream would be outstanding!

Anyway, you decide how you want to eat it because it's good either way.  Enjoy!

Sunday, October 21, 2012

Winter is Coming!

 Some last photos of summer starting to fade.

 Last blooms of fall.

Sweet Andi has now achieved 14 years and 4 months on the birthday dog scale.  That's 100 years old in human terms!  This is a long time for an 80 pound Springer to live but we're happy he's still with us!

Our Bizy Bea is now three years old (55 lbs.) in dog years or a young 21 years in human years.

Grass is still green but the crab apple on the right is starting to lose its leaves.

 Our home in Maine

 Bizy with a fallen branch she grabbed up while Richard was doing clean up in the flower beds to put them to rest for the winter that is coming.


Long afternoon shadows with the valley below.

 Back of our home as the sun is setting for the day.

Mowed area at back of fence before the uncut field begins.  Dogs on their afternoon walk.

 Notice posts rising out of the ground - this is due to winter heaving.  This post will  have to be fixed next spring.  Temporary boards were nailed on this summer to keep Bizy from getting out and nasty porcupines getting in at night!

Back of our home with fence around approx. a half acre to keep the deer out and the dogs in.  More long shadows from the tall trees of the forrest

Tall trees surrounding us - all ours since we live on 52 acres.

My studio over the garage with a view of one of my looms through the window.

 Wood pile that Richard just finished loading into the garage for our wood stove for winter heat today.  There's approx. 2.5 cords of wood in that pile which will serve us well this winter - big job moving all this wood but thank goodness for the tractor!

 Our magnificent birch in our front yard starting to lose its leaves also.

A Japanese Maple that is usually bright green throughout the summer has now changed to this brilliant orange and is losing its leaves!  Maples and oaks down the tree line plus the big oak has just about lost all of its leaves too.  Notice the ice plant in the flower boxes have turned a bright orange.

Taken yesterday while it was raining through the family room windows.  There is another maple in the next flower bed over that has turned a dark orange.  There are some colored trees to the top of the photo also that have changed color.

 View to the forrest with our other 40 acres from the back yard.

Veggie garden has all been taken down now and nothing left but some carrots and onions.

Bird house that is currently being lived in by a squirrel!

Another view to the valley along with Andi ambling along on his afternoon walk.  This might prove to be a tough winter for old Andi.  We will see!

Sunday, October 14, 2012

"Pizza Time"


I ran across a recipe by Mark Bittman recently on making pizza.  Since I've had an abundance of tomatoes from the garden I decided to roast some tomatoes first to keep in quart mason jars in the freezer to use throughout the winter.  I set one jar aside to use for the pizza the next day.  Roasting tomatoes can take hours sometimes so I didn't want to get into pizza making too on the same day - I like to keep things easy and simple!

Clean, remove any nasties, cut in half.  Pour a dollop of olive oil on a cookie sheet.  Lay out the tomatoes, rubbing them in the oil until both sides are covered.  I also decided to roast some peppers at the same time.  Sprinkle garlic salt, pepper and thyme over the tops of tomatoes before going in the oven.  You can use any seasonings you like so feel free to try different flavors.  I had enough tomatoes to cover three trays nice and snug.  Bake at 350 degrees for at least 2 hours or until tomatoes have caramelized but not burnt.  The peppers might get really browned and you might want to remove them sooner if you don't like that taste.  I left mine in until everything was carmelized and the peppers were charred.  You decide.

My on-the-counter canister was empty - thank you DH!  He premixes his waffle mix in a large plastic container and he had emptied out my canister so needed to refill.  My flour storage bins in my always too small pantry!

I keep two 5 gallon containers of flour in my pantry plus a 5 gallon buckets of whole wheat kernels in the pantry in my kitchen and then many buckets of w/w berries in the basement storage along with many other grains and seeds.....nope, not Morman but I've always believed in being prepared!


I made the dough up in the food processor per instructions below.  Sorry, no pictures of that being done but because I could use the processor I thought this would be a less messy process which it was.  I like to add seasonings to my pizza dough so there is some seasoned salt and a mix of peppers in the dough.  I set it to rise......here's the recipe....

Pizza Dough
by
Mark Bittman

3 cups all purpose or bread flour
2 tsp. instant yeast
2 tsp. coarse kosher or sea salt, plus extra for sprinkling
2 T. olive oil
1 cup warm water

1.  Combine the flour, yeast, and salt in a food processor.  Turn the machine on and add 1 cup of warm water and the oil through the feed tube.

2.  Process for about 30 seconds, adding more water, a little at a time until the mixture forms a ball and is slightly sticky to the touch.  If it is dry, add another tablespoon or two of water and process for another 10 seconds.

3.  Turn the dough onto a floured work surface and knead by hand for a few seconds for a smooth, rounded dough ball.  Put the dough in a bowl and cover with plastic wrap; let rise for 1-2 hours.

4.  When the dough is ready, form it into a ball and divide it into 2 or more pieces if you like; roll each piece into a round ball.  Put each ball on a lightly floured surface, sprinkle with a little flour, and cover with plastic wrap or a towel.  Let rest until they puff slightly, about 20 minutes.  Proceed with adding your favorite toppings.

My toaster oven is set at 120 degrees with a towel on top. The usual way I like to proof yeast breads.  I waited and looked forward to the dough being big and fluffy in about an hour or so......I waited and then I waited and then I waited!  It was getting late and it was clear this dough was not going to be pizza that night!  Take-out saved the day!  I put the bowl in the refrigerator and it stayed there until the next early evening.  I took the bowl out of the refrigerator about an hour before I needed it and let it set to warm up.  I rolled the whole recipe out on a floured cutting board and put onto a peel for decorating.

Dough on the peel with the roasted tomatoes on top along with Margarita pepperoni sliced on the diagonal.  Plenty of oil from the tomatoes so no need to add any extra oils - just spread the oil around with a spoon to cover the outside edges.


Added fresh basil from the garden along with sliced black olives and a sprinkling of pizza seasonings.

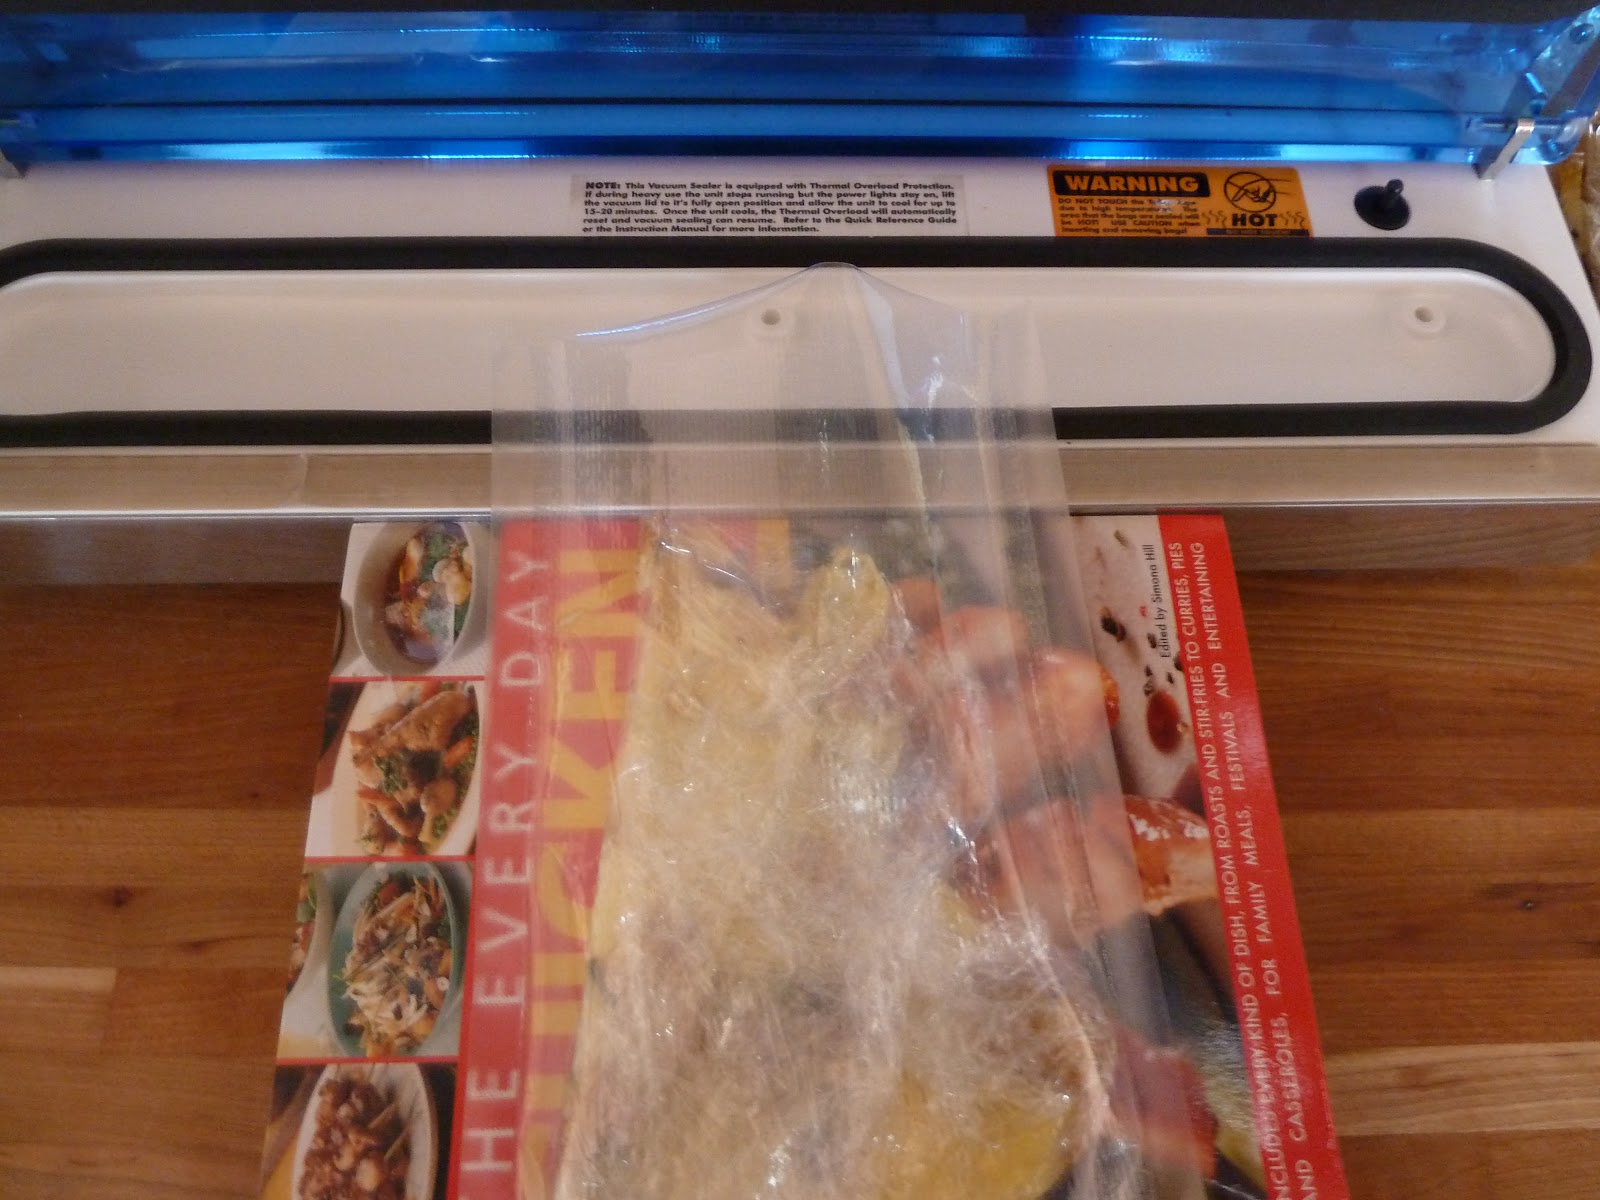
I cut open a package of vacuum sealed mozzarella cheese that I had in the freezer since last November!  Vacuum sealers are the most wonderful machines (another topic for another day).  I buy mozzarella in super size bags from Sam's (like Costco) and then I package it up, seal and freeze for when I'll need it.  This cheese was as fresh as the day I bought it - soft and tasty!

Pizza ready to go in the oven on my preheating (500 degrees)  pizza stone to be baked.

Bake for 15 minutes and remove to a cutting board - delicious!

The dough crust was good, a little thicker and heavier than my usual pizzas but that's probably more a product of me not rolling the dough out thin enough - all fixable next time.   I guess my favorite all time crusts on a pizza are crisp and thin and I usually grill them on the barbecue.  I had a new pizza stone I had bought from Forno Bravo (http://www.fornobravo.com/pizza-stone/index.html#pizza_stone) many months ago and I wanted to finally give it a try.  Stone is wonderful but the pizza almost drips off the edges so next time I need to make sure not to make the dough quite so large or roll it more in a rectangle shape.

All things considered this pizza was delicious and I'll use the recipe again but I'll just plan ahead next time!


Sunday, October 7, 2012

Fall in New England


Foliage Season has arrived!

If we don't get too many rain and wind storms it just might last for a week or more!